Thursday, March 25, 2010

The Five Dollar Challenge & My Easter Topiary {Tutorial}...again!

A couple of weeks ago I was inspired by The Five Dollar Challenge by Living with Lindsay to create something to decorate for Spring using as little money as possible. I made a trip, my first, to a local Dollar Tree store, and as I went inside I really had no clue as to what I would make. I browsed the aisles one at a time and sort of just let my inspiration come to me as I looked at all of the items the store had to offer. When I saw the beautiful Robin's egg blue bowls I knew that they would be the perfect base for a sweet little Easter topiary. So, I snatched it up and then went on the hunt to find some other supplies to make a topiary. My goal when I went in the store was to spend as little as possible on my craft, so I also kept in mind what supplies I had on hand at home.


I bought this beautiful blue bowl and the "eggs" for my topiary are simply bubble gum eggs! Bowl = $1, Eggs = $1, so $2 total so far.


I bought the floral foam, the styrofoam balls, a second blue bowl...to give a second topiary as a gift to my aunt...and I also needed some more gum to complete my second topiary (another $4) and that's all I had to pay out-of-pocket at the store for my project. $6 total for two topiaries isn't bad! (And, btw, my aunt {LoVeD} getting her sweet little Spring surprise from me! It was fun to be able to give one away!)


I found some unused pencils that I had at home and pulled out some ribbon from my ribbon stash to wrap around the pencils.


After sticking the pencil into the foam ball, I removed it briefly and squirted some hot glue in the hole before reinserting the pencil.
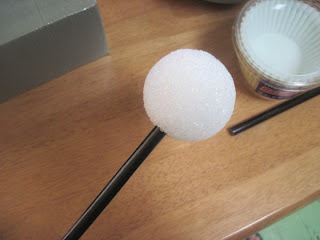

Once the glue hardened around the pencil I began wrapping my ribbon around the pencil. Hot gluing it at the top to keep it in place.


Here are my two wrapped pencils. Ready for the next step...


...I grabbed some Spanish moss that I already had in my craft supplies and simply hot glued some around the foam ball. This made a perfect "nesting" area for the bubble gum eggs!
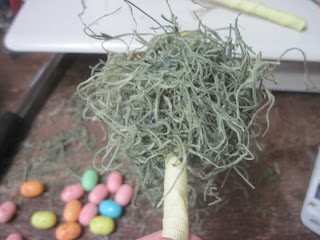

After the foam ball was adequately covered with the moss I started hot gluing on my eggs. I just started at the very top and went down from there. I didn't pack them extremely tight that way you could see some of the moss poking through. It took 4 dozen gum eggs per topiary...or, $1 worth of gum!


After my eggs were glued all around the topiary form, I trimmed the floral foam and hot glued it to the bottom of the bowl.


I also hot glued the left over foam and wedged them into the corners to add stability. I made a hole and inserted some more hot glue and then stuck in the topiary and held it 'til the glue hardened.
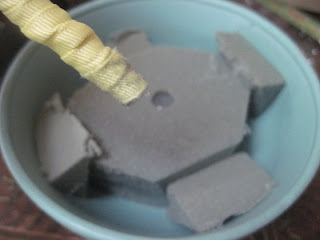

Once the topiary was in place I covered the floral foam with a bit of moss...


...and here is my finished Easter Topiary. I tied a sweet little bow beneath it to add an extra touch! Not bad for just 3 dollars, is it?!! I really love it, and love that I was "forced", haha, to be extra creative to come up with it! It is probably my favorite craft that I have made this year!


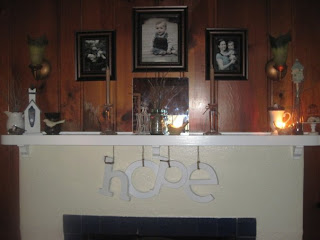
I think that it is the perfect addition to My {Sweet} Spring Mantel, don't you?!!


*I originally posted this tutorial a few days ago, but changed it up just a tad for today's challenge!*


I am linking this little sweetie up to The $5 Challenge at:


Tuesday, March 23, 2010

{Giveaway} Winner!

Random.org has spoken, and we have a winner in my little Lolita Martini glass Giveaway...and the lucky lady is:

Cindy from Creations by Cindy! Congratulations! You can send your address to me at rubymoondesigns@gmail.com, and I will get your gift out to you asap!

Thanks to you sweet ladies who participated!


Monday, March 22, 2010

Easter Topiary {Tutorial}

A couple of weeks ago I was inspired to create something to decorate for Spring using as little money as possible. I made a trip, my first, to a local Dollar Tree store, and as I went inside I really had no clue as to what I would make. I browsed the aisles one at a time and sort of just let my inspiration come to me as I looked at all of the items the store had to offer. When I saw the beautiful Robin's egg blue bowls I knew that they would be the perfect base for a sweet little Easter topiary. So, I snatched it up and then went on the hunt to find some other supplies to make a topiary. My goal when I went in the store was to spend as little as possible on my craft, so I also kept in mind what supplies I had on hand at home.


I bought this beautiful blue bowl and the "eggs" for my topiary are simply bubble gum eggs! Bowl = $1, Eggs = $1, so $2 total so far.


I bought the floral foam, the styrofoam balls, a second blue bowl...to give a second topiary as a gift to my aunt...and I also need some more gum to complete my second topiary (another $4) and that's all I had to pay out-of-pocket at the store for my project. $6 total for two topiaries isn't bad!


I found some unused pencils that I had at home and pulled out some ribbon from my ribbon stash to wrap around the pencils.


After sticking the pencil into the foam ball, I removed it briefly and squirted some hot glue in the hole before reinserting the pencil.


Once the glue hardened around the pencil I began wrapping my ribbon around the pencil. Hot gluing it at the top to keep it in place.


Here are my two wrapped pencils. Ready for the next step...


...I grabbed some Spanish moss that I already had in my craft supplies and simply hot glued some around the foam ball. This made a perfect "nesting" area for the bubble gum eggs!


After the foam ball was adequately covered with the moss I started hot gluing on my eggs. I just started at the very top and went down from there. I didn't pack them extremely tight that way you could see some of the moss poking through. It took 4 dozen gum eggs per topiary...or, $1 worth of gum!


After my eggs were glued all around the topiary form, I trimmed the floral foam and hot glued it to the bottom of the bowl.


I also hot glued the left over foam and wedged them into the corners to add stability. I made a hole and inserted some more hot glue and then stuck in the topiary and held it 'til the glue hardened.


Once the topiary was in place I covered the floral foam with a bit of moss...


...and here is my finished Easter Topiary. I tied a sweet little bow beneath it to add an extra touch!


I think that it is the perfect addition to My {Sweet} Spring Mantel, don't you?!!


Linking up to:

Make it For Monday @ Cottage Instincts

Met. Monday @ BNOTP
Toot Your Horn Tuesday @ A Silly Little Sparrow
Talented Tuesday @ My Frugal Family
Nifty Thrifty Tuesdays @ Coastal Charm

Saturday, March 20, 2010

Saturday {Giveaway}!!!

In my nesting craze and obsession with all things being organized, I have come across a few items in my home that I totally forgot I even had...isn't it fun to find a surprise you already own?!! Anyways, one of the things I found was a cute Lolita Shopaholic Too martini glass like the one pictured below. It was still in it's original box and I have never even used it...in fact, I've never even had a martini, ha! I thought of stashing it away in my ever-growing garage sale pile, but then I thought, heck, why not give it away! It really is a fun little glass, and I am sure someone will be able to enjoy it more than me. You could use it for its intended purpose, or re-purpose it to hold little odds and ends on a desk or in the kitchen.


To enter giveaway simply follow me and leave a comment or let me know that you already follow Ruby Moon Designs. Pretty easy, right?! Giveaway closes on Monday, March 22nd at midnight (CST) and winner will be picked at random on Tuesday! Sound good?

Have a great weekend, everyone!


Thursday, March 18, 2010

My {Favorite} Shoes!

Beth over at The Stories of A 2 Z is hosting a "Show me Your Shoes Party"...so of course I had to join! I am going to make this quick tho...my little one is asleep, and my baby-building body is telling me to take a nap as well...so as soon as I tell you a little about my favorite shoes, I am hitting the hay! Like a lot of my tastes, my preference in shoes is pretty simple and practical...so here is what I wear almost every day:


Flip Flops!


I have this pair from Old Navy...and probably at least a dozen others as well. I pretty much wear them every day, every month of the year...thankfully we live in a warm climate or else my little toes would freeze right off! I also love any sort of sandals, and have quite a few of them in my closet to prove it! I like to wear heels...occasionally, but not often...and I don't like to wear tennis-shoes...too hot on my feet! Probably my very favorite thing to wear on my feet is nothing at all! I {LoVe} going bare foot, but can only get away with it when I'm at home...therefore, flip flops are the next best thing when I'm out and about!

I love having painted toe nails too...but right now it's a bit rough to bend over and paint them myself...maybe a pedicure is in my future???!!! With the rest of my body being taken over by this little baby maybe my toes could look pretty at the very least! Haha!

Okay, ladies, I'm off to catch some ZZZZzzzz's. Don't forget to head over to Beth's blog to see some other fun footwear!


I Finally Fell...in {LoVe} with PB!

After reading about so many bloggers infatuation with all things Pottery Barn, I finally decided to check them out...for some reason I had held off until just this past week...and I'm not sure exactly why...perhaps because I knew that PB was a bit too expensive for my current budget...perhaps because I didn't want to just join the crowd...in the end though it was inevitable, and when I fell for PB, I fell hard! I am in {LoVe}!

I had their catalog sent to me, and being the Pottery Barn virgin that I was, I didn't even glance at the cover until I was ready to soak it all in. On a sunny afternoon a few days ago, I sat out in my front yard, enjoying a picnic lunch with my son, and as he played in the yard I soaked up some rays and some Pottery Barn! There is so much to gain from browsing through the beautiful photos in the catalog...and online...and I had the best time looking through everything, and now I know what all the hype is about! I still won't be able to afford their stuff, but I can have fun creating some of the PB look with the budget that I do have!

Here are some of the photos of some of the Pottery Barn items that I really love...click on individual photos to be directed to their website for more product info.


Aren't these lovely?! Vintage found canning jars...I would love some of these...but I will have to find my own!


I love all the storage on this media wall...though with a toddler I think that I would have to keep the scissors out of reach!


I just love this collector's shadow box...and it would be very easy to create on my own too I think! Something to keep in the idea files!


I just like the look of this photo...the lovely framed black and white prints, the soothing blue wall, the bench with the storage baskets underneath...I {LoVe} baskets and have tons scattered around my home holding various necessities.


These beachcomber baskets are beautiful! Would {LoVe} some of these...I have some similar ones that I found at Joann's...and I must admit the price tag @ J's is a little more my style!


And, lastly, these rustic wooden risers with the nests snuggled sweetly under the cloches. Beautiful! This look could fit right in on my front porch. Lovely!

So, y'all, there you go. I am a Pottery Barn virgin no longer! ;)


Tuesday, March 16, 2010

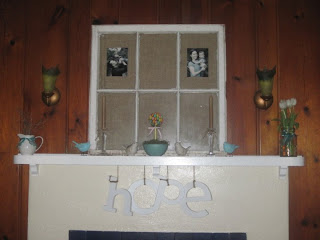
My {Sweet} Spring Mantel

I have been inspired by Beth over at Stories of A 2 Z and all of her creative mantel ideas. To be perfectly honest, I used to be quite content with setting up a few vignettes on my mantel and leaving it at that...for months at a time, with no change...however, after Beth hosted several mantel parties at her blog a while back, and I got the itch to change things up on a more regular basis...but I still wanted it to be fairly easy to do. So, this is what I came up with!

~~~~~~~~~~~~~~~~~~~~~~~~~~~~~~~~~~~~~~~~~~~~~~~

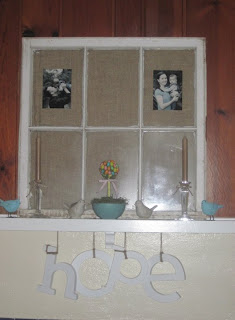
I bought this lovely old vintage window for $1 while out garage sale shopping last fall. It was sitting in my garage just waiting for inspiration to hit! I hot-glued burlap to the back of it to break up a bit of the wood paneling on the wall (I like the wood paneling, but a whole house
full of it gets a bit boring on the eye sometimes). I like that I can stick up whatever pictures I want on the window, whenever I want to, and can change out the look of the
focal point of my mantel with ease!


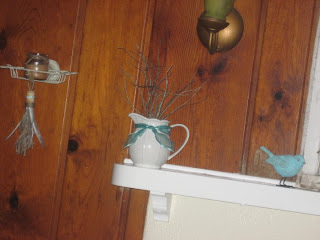
This little birdie was purchased at the Dollar Tree and painted blue to help spruce up my {Sweet} Spring Mantel!


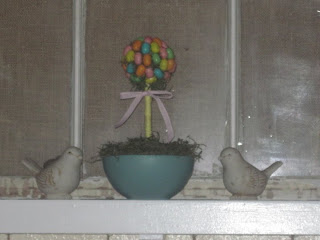
The little white birdies were also purchased at DT, and left as is.


I made the cute little Easter topiary - materials from the DT - total cost under $3.


I just love how my topiary turned out! It was sooooo easy to make (and yes, I do have a tutorial, but I am waiting to put that up 'til later...you'll see why!).


My aunt gave me these lovely white tulips which are tucked in a vintage jar that I found at a garage sale last fall for about 50 cents I think. I also jumped on the tassel train and made two sweet little tassels from vintage thread spools and some leftover jute twine and other ribbon scraps. They are hanging from my soap dishes turned candle holders!


The little white pitcher was a cheap-o find at ROSS for a few bucks.


Here are two previous looks that my mantel had...this first one had been there, without change (not counting the little I did for Christmas) for about a year!


I switched it out for this one...but only for a day, and then changed it back to the previous look before changing it to what I have now.


I like the brighter look of my new mantel much better...I know, it's hard to tell from these pictures, but it really is much lighter looking in person...during the day. The only lighting in this room is from the two very small light fixtures over the mantel and a few other lamps I have in our living room. It is a fairly decent sized room, and I do not know why there is no overhead lighting...it gets really annoying and I really dislike the dim look this room has when the natural light isn't coming through the windows. Oh, well, I guess it'll have to do for now...there's only so much you can do when you rent! I am really loving my {Sweet} Spring Mantel...especially because the total cost to make it pretty for the fresh season of spring was only about $10! Can't go wrong with that!


Linking up to:
Toot your Horn Tuesday @ A Silly Little Sparrow
Talented Tuesday @ My Frugal Family
Nifty Thrifty Tuesdays @ Coastal Charm